

Table of Contents
- Pre-Inspection Planning and What to Bring
- Engine and Under-Hood Inspection for Heavy-Duty Diesel Trucks
- Testing for Diesel Engine Blow-By
- Brake System and Drivetrain Assessment
- Reviewing Used Truck Maintenance Records
- Emissions Control and Diagnostic Scan
- Executing Your Used Diesel Truck Inspection Checklist and Road Test
- Common Mistakes to Avoid During Inspection
- Frequently Asked Questions
Last Updated: October 11, 2026
Pre-Inspection Planning and What to Bring
Inspecting heavy-duty diesel trucks requires preparation. Gather a flashlight, basic hand tools, a tire pressure gauge, and a diagnostic scanner to read engine codes.
Bring a checklist of specific concerns and request maintenance records upfront, they reveal how well the vehicle was cared for and shape your inspection focus.
Plan for at least two hours to examine the engine, brakes, tires, electrical systems, and conduct a road test. Rushing leads to missed problems.
Engine and Under-Hood Inspection for Heavy-Duty Diesel Trucks
Open the hood and assess overall condition. A clean engine bay suggests regular maintenance; dirt and oil buildup indicate neglect.
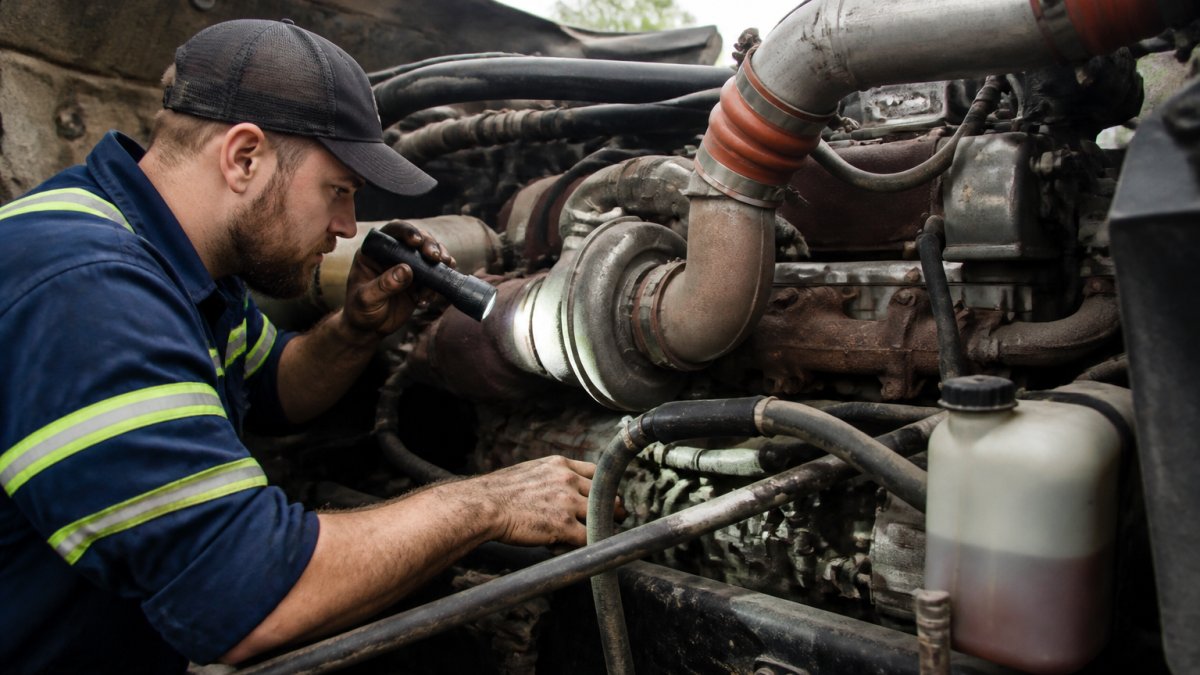
Engine Oil and Fluid Levels
Check the engine oil level with the dipstick, it should be between minimum and maximum marks. Dark, thin oil suggests an imminent oil change; thick, sludgy oil indicates poor maintenance or internal engine problems.
Inspect coolant level in the overflow tank when the engine is cold. Low coolant points to leaks or overheating; rust-colored coolant signals internal corrosion.
Check transmission fluid while the engine idles. Bright red is healthy; dark red or brown indicates wear and imminent service needs.
Cooling System and Coolant Condition
Examine hoses for cracks, soft spots, or leaks. Squeeze them gently, they should feel firm, not spongy. Soft hoses must be replaced before failure.
Check the radiator for debris and bent fins (which reduce cooling efficiency). White or green stains around hose connections signal slow leaks.
Feel the upper and lower radiator hoses. If one is hot and the other cold, the thermostat may be stuck, preventing proper coolant flow and causing overheating.
Belts, Hoses, and Engine Mounts
Inspect serpentine belts for cracks, fraying, or glazing. Check tension, the belt should deflect about half an inch when pressed midway between pulleys.
Check engine mounts by having someone gently rock the truck in and out of gear while you watch the engine. Excessive movement indicates worn mounts and potential vibration damage.
Testing for Diesel Engine Blow-By
Blow-by, unburned fuel and combustion gases leaking past piston rings, is normal in small amounts but indicates serious internal wear when excessive.
Remove the oil filler cap while the engine idles and place your hand over the opening. Slight pressure is normal; strong pressure indicates serious internal wear and expensive repairs ahead.
Listen for a whistling sound at the cap, another sign of excessive blow-by. This quick test reveals critical engine condition.
Brake System and Drivetrain Assessment
Inspect brake fluid in the master cylinder, it should be clear to light brown. Dark or cloudy fluid indicates water contamination requiring immediate flushing.
Check brake lines for corrosion, cracks, and leaks. Look underneath for drips or stains signaling active leaks.
Test the parking brake by engaging it and attempting to roll the truck. A weak hold suggests worn brake shoes or cables.
Brake Lines, Chambers, and Slack Adjusters
Inspect air brake chambers for cracks or dents. Damaged chambers lose air pressure and cause brake failure.
Check slack adjusters by spinning them by hand, they should turn smoothly. Stiff or stuck adjusters indicate brakes out of adjustment and ineffective stopping power.
Inspect brake lines for kinks, dents, or separation. Trace lines from the compressor to each wheel to spot air leaks and reduced braking power.
Tires, Wheels, and Suspension
Measure tire tread depth with a penny inserted upside down. If you see the top of Lincoln’s head, tread is below 2/32 inches and tires need replacement.
Check tire pressure and wear patterns. Underinflation reduces fuel economy; overinflation causes center wear. Uneven wear suggests alignment or suspension problems.
Inspect wheels for cracks, bends, or rust. Verify lug nuts are tight with no signs of loosening.
Bounce each corner of the truck. It should compress smoothly and return to level once. Multiple bounces indicate worn shocks or springs.
Reviewing Used Truck Maintenance Records
Request all service records from the seller. Regular oil changes every 10,000 to 15,000 miles show consistent owner care.
Check for major repairs (transmission rebuilds, engine work, frame repairs). Ask why work was done and request documentation.
Look for fuel filter changes and coolant flushes. Missing records for routine maintenance raise red flags about the truck’s actual condition.
Emissions Control and Diagnostic Scan
Connect a diagnostic scanner to the OBD-II port (typically under the driver’s dashboard). Modern diesel trucks log codes in the engine control module (ECM), transmission control module (TCM), antilock brake system (ABS), and emissions control system. Use a quality scanner that reads all modules, not just the engine.
Understanding Diagnostic Trouble Codes
Active codes indicate current faults demanding immediate attention. Pending codes suggest intermittent issues that may clear after several drive cycles. Cleared codes without documented repairs are a red flag.
Common codes include P0087 (fuel pressure too low), P0101 (mass airflow sensor fault), and P0401 (EGR flow insufficient). Transmission code P0700 warrants a full scan and road test under load. Do not ignore codes; many faults worsen over time.
Aftertreatment System Diagnostics
Diesel engines after 2007 have a diesel particulate filter (DPF) that regenerates passively during highway driving or actively via fuel injection. Check regeneration history on the scanner.
Look for DPF codes: P0401, P0471, or P242F. A clogged DPF requires removal and cleaning or replacement, costing $2,000 to $4,000.
SCR systems use diesel exhaust fluid (DEF) to reduce nitrogen oxides. Check DEF tank level and condition, DEF degrades if frozen or stored over two years. Scan for SCR codes P20EE or P20A7, indicating catalyst failure or poor DEF quality.
EGR systems route exhaust back into the intake to reduce combustion temperature. EGR coolers are prone to carbon buildup on high-mileage trucks. Codes P0400-P0409 indicate EGR faults; listen for rough idle or hesitation during acceleration.
Emissions Readiness Monitors
Readiness monitors should show “Ready” after 15 to 20 minutes of mixed driving. If monitors remain “Not Ready” after a proper road test, the truck may have a communication fault or component preventing self-tests.
Request a full diagnostic report from a qualified diesel technician. A thorough scan (30-45 minutes) should include module communication tests, live data streaming, and freeze-frame data to reveal whether faults occurred during normal operation or extreme conditions.
Executing Your Used Diesel Truck Inspection Checklist and Road Test
Create a written checklist and document findings with photos, noting mileage, engine hours, and inspection date. This protects you in disputes and aids objective comparison.
Pre-Road-Test Stationary Checks
Visually inspect the exterior for rust, dents, frame damage, and accident signs. Check the undercarriage for oil leaks, rust, or missing heat shields. Start the engine from a cold state (no running for two hours). Diesel engines should start smoothly within 5-10 seconds. Slow cranking suggests weak battery or low compression. Excessive white smoke beyond 30 seconds indicates coolant leaks or worn rings.
Gauges, Lights, and Electrical Systems
Check all warning lights on the instrument cluster, they should illuminate briefly then extinguish. Check engine, amber engine, or red stop-engine lights indicate active faults requiring diagnostic scanning.
Watch fuel, temperature, and oil pressure gauges. Oil pressure should reach 20-40 psi immediately; temperature should climb to 180-210°F. Erratic readings suggest faulty sensors or wiring. Listen for smooth, consistent idle; rough idle or hunting suggests fuel injector, air leak, or EGR problems.
Test all exterior lights. Multiple burned-out bulbs suggest an electrical problem or failing alternator.
Cold-Idle and Warm-Up Observation
Let the engine idle 3-5 minutes. Listen for knocking, whistling, or grinding. A light valve cover ticking is normal; deep knocks suggest bearing wear. Black smoke indicates rich fuel or failing turbo; white smoke suggests coolant burning; blue smoke indicates oil burning.
Monitor the coolant temperature gauge. It should rise smoothly. Rapid climbs followed by drops suggest a sticking thermostat; no rise suggests a stuck-open thermostat or faulty sensor.
Road Test Procedure and Operating Conditions
Drive at moderate speed (35-45 mph) for 5 minutes to warm the engine. Listen for grinding, knocking, whistling, or clunking.
Accelerate firmly from a stop. The engine should respond smoothly.
Shift through gears smoothly. Automatic transmissions should shift crisply; manual transmissions should have smooth clutch engagement.
Drive at highway speed (55-65 mph) for 10-15 minutes.
Test braking at 30, 45, and 55 mph. Brakes should feel firm and responsive with no sponginess, fading, or pulling.
Make sharp turns at low speed. The truck should handle without excessive body roll or clunking.
Accelerate hard on a safe highway stretch. The engine should produce strong power.
Observe transmission behavior under load. Automatic transmissions should downshift and upshift smoothly. Delayed shifts or slipping suggest wear or low fluid.
Check for smoke or unusual odors. Black smoke during hard acceleration should clear quickly.
Post-Road-Test Inspection
After the road test, park the truck and let it idle for 2 to 3 minutes before shutting down. This allows the turbocharger to cool gradually; shutting down a hot turbo immediately can cause bearing damage. After shutdown, wait 5 minutes, then check all fluid levels again. Oil and coolant levels should not have dropped noticeably.
Feel the exhaust manifold and turbocharger housing (carefully, they are hot). They should be hot but not so hot you cannot hold your hand near them for more than a second. Excessive heat suggests the engine is running lean or the turbo is working too hard.
Check under the truck for fresh oil, coolant, or transmission fluid drips. Leaks that appear after a road test are more serious than slow seeps, as they indicate active problems under load.
Common Mistakes to Avoid During Inspection
Don’t skip the maintenance records. Many sellers claim perfect service history but can’t prove it. Unverified claims are worthless.
Don’t ignore warning signs. A small oil leak today becomes a major problem tomorrow. Address every concern before buying.
Don’t rush the road test. Twenty minutes of driving reveals problems that a stationary inspection misses. Engine knock, transmission slipping, and brake fade only show up under load.
Don’t rely on your eyes alone. Use diagnostic tools. A scanner catches problems that visual inspection cannot detect. This is especially critical for emissions systems and electronic components on modern diesel trucks.
Inspecting a used heavy-duty diesel truck demands attention to detail and the right tools. Our mobile inspectors travel to your location and deliver the independent verification you need to buy with confidence. ORDER INSPECTION
Frequently Asked Questions
What should a heavy-duty truck pre-purchase inspection include?
A comprehensive inspection of inspecting heavy-duty diesel trucks covers engine condition, all fluid levels, cooling system, belts and hoses, brake system components including chambers and slack adjusters, tires and wheels, electrical systems, lights and gauges, emissions controls, and a road test under load. Professional inspectors also review maintenance history, check for diagnostic codes, and assess frame and structural integrity. This systematic approach identifies wear, repair needs, and potential safety issues before purchase.
How do you check the maintenance history of a used diesel truck?
Request service records from the seller covering oil changes, filter replacements, fluid services, and major repairs. Cross-reference records with the vehicle history report to verify consistency. Check for gaps in maintenance that may indicate neglect. Ask the seller directly about off-the-books repairs or informal service. A complete used truck maintenance records file shows regular intervals and appropriate care; missing or irregular service suggests potential hidden problems or deferred maintenance that could affect reliability.
How can you tell if a diesel engine has blow-by?
The diesel engine blow-by test involves checking for excessive crankcase pressure and oil vapor escaping past worn piston rings or cylinder walls. Remove the dipstick or oil filler cap while the engine idles; strong oil vapor or air pressure indicates blow-by. Inspect the air intake for oil residue, check the condition of the air filter for excessive oil saturation, and listen for hissing at the crankcase breather. Excessive blow-by signals ring wear or cylinder damage, both costly repairs that should lower your offer or disqualify the truck.
What is the best way to perform a diesel truck road test checklist?
Start with a cold start, listening for rough idle or white smoke. Accelerate smoothly under no load to assess throttle response and listen for knocking. Drive at highway speeds to test transmission shifting, engine load response, and stability. Brake test on a safe road to confirm brake feel and responsiveness. Test power steering, all gauges, and warning lights. Listen for abnormal noises from the drivetrain or suspension. A proper diesel truck road test checklist covers acceleration, braking, steering, and electrical function under real-world conditions, revealing issues that stationary inspection misses.